Thinking about giving Shopify a shot, but hesitant to dive in? You are definitely not the only one! In 2025, Shopify is offering a 3-day free test that allows you to fully detect platforms, set up your store, and check all its features. No Payment details are necessary.
However, here is the catch: Once your free testing period ends, Shopify will encourage you to select a payment plan if you wish to continue selling your products.
In this guide, I will walk you through the process of canceling your Shopify free trial correctly. I will also expose some important steps before closing my store, as well as some easy tips to help you find out whether Shopify fits your needs.
Whether you are immersing your toes or ready to launch your ecommerce venture, this step-by-step guide will empower you to move forward with confidence.
Let’s get started!
Why You Might Want To Cancel Your Shopify Free Trial?
There are several reasons why you might choose to cancel your Shopify free trial:
- The platform doesn’t meet your specific business needs
- You found a better alternative for your online store
- You’re not ready to launch an e-commerce business yet
- The Shopify pricing plans don’t fit your budget
- You completed the 3-day free trial and did not opt for the $1/month offer.
How To Cancel Shopify Free Trial (Step-by-Step)
Whatever your reason, canceling your trial is a straightforward process. Let’s go through it step-by-step.
Step 1. Start by logging into your Shopify admin panel using your email and password.
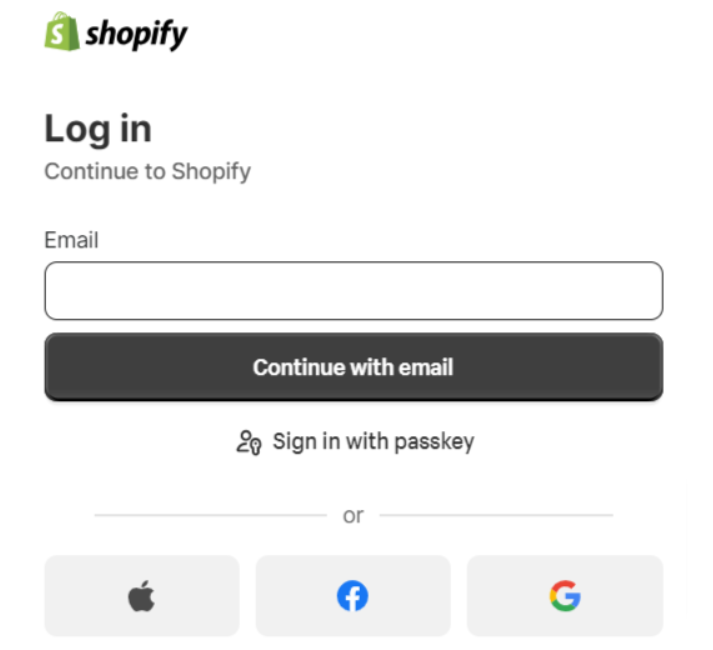
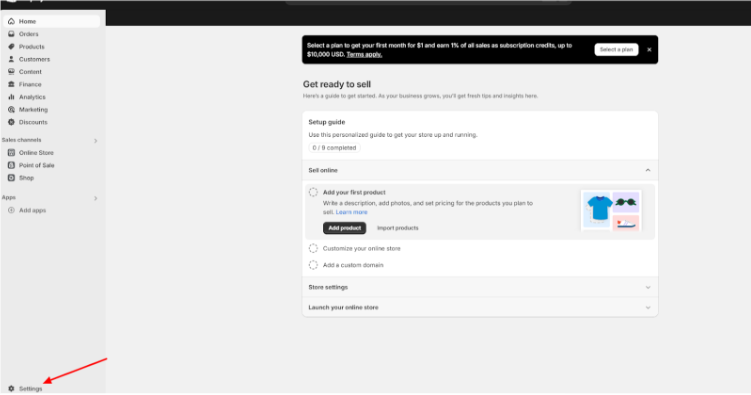
Step 2. Once logged in, look for the “Settings” option in the bottom left corner of your dashboard. Click on it to access your account settings.
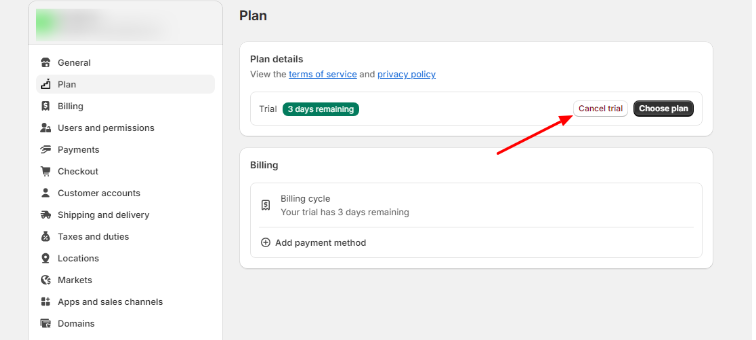
Step 3. In the Settings menu, find and click on the “Plan” option. This will take you to a page showing your current plan details.

Step 4. You’ll see a “Cancel Trial” button. Click on it to start the cancellation process.
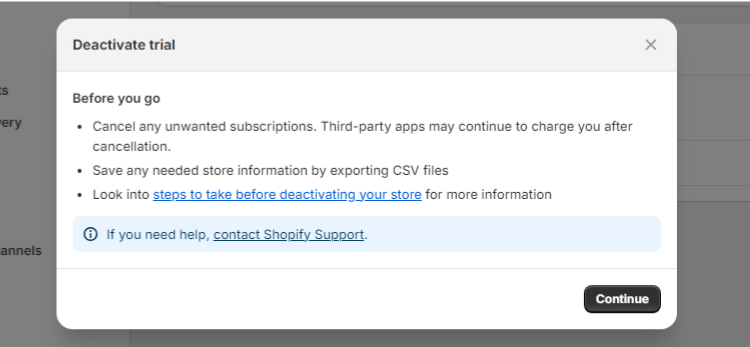
Step 5. A pop-up window will appear, showing you things you need to do before canceling. Review the instructions and then click “Continue”.
Step 6. Shopify will ask why you’re canceling. Select a reason from the dropdown menu and add any additional comments if you wish. Then, click Continue.
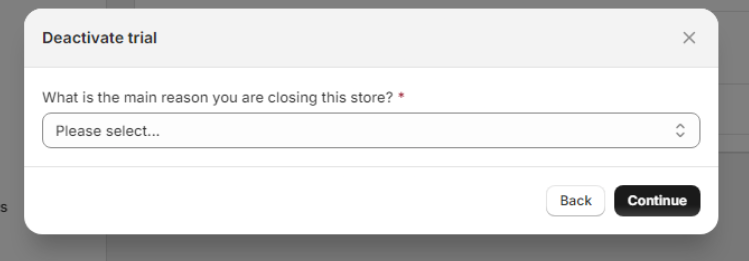
Step 7. Enter your password to confirm the cancellation. Then click “Deactivate Store” to finalize the process.
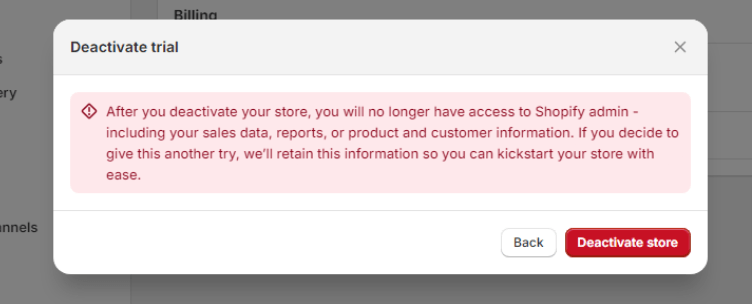
After completing these steps, you’ll receive an email confirming that your store has been deactivated and your trial canceled.
Important Things To Do Before Canceling Shopify Free Trial
Before you hit that final “Deactivate now” button, there are a few important tasks to take care of:
1. Back Up Your Store Data
Even if you’re not continuing with Shopify, the work you’ve done might be valuable later. Export your store data as CSV files. Go to Settings > Export and download CSVs for products, customers, and orders.
2. Remove Payment Information
Double-check that you’ve deleted any credit card or payment details from your account. This prevents accidental charges if you forget to cancel fully. Go to Settings > Payments and remove any saved payment methods.
3. Cancel Third-Party App Subscriptions
If you installed any paid apps during your trial, cancel those subscriptions separately. Some may continue billing even after canceling Shopify.
4. Transfer Custom Domains
If you bought a domain through Shopify, consider transferring it to another registrar before canceling. This lets you keep the domain for future use.
5. Save Your Login Credentials
You might want to revisit your store later, so securely save your Shopify login email and password, just in case.
What Happens After You Cancel?
Once you cancel your Shopify trial:
- Your store becomes inaccessible to you and your customers
- You can’t process orders or make changes
- Shopify keeps your store data for 2 years
- You can reactivate within that 2-year period by choosing a paid plan
- After 2 years, Shopify permanently deletes all your data
What Is a Shopify Free Trial?
Shopify’s free trial lets you set up your online store and explore its features for three days without paying. You can add products, customize your store, and configure settings, but you can’t sell or accept payments until you pick a paid plan.
Here are Shopify’s current U.S. pricing plans (billed annually):
| Plan Name | Monthly Cost | Best For |
|---|---|---|
| Starter | $5/month | Selling via social media or messaging apps only |
| Basic | $29/month | New sellers building a full online store |
| Shopify (Standard) | $79/month | Growing businesses need staff and reports |
| Advanced | $299/month | Scaling brands requiring advanced tools and analytics |
| Shopify Plus | From $2,300/month | Large enterprises with high-volume sales |
Making The Most Of Your Shopify Free Trial
If you’re still in your 3-day free trial or $1/month promotional period and unsure about canceling, here are some tips to get the most value:
- Set Clear Goals: Before starting, outline what you want to accomplish during the trial. This helps you stay focused and evaluate if Shopify meets your needs.
- Explore All Key Features: Don’t stick to just the basics. Test out more advanced features like discount codes, abandoned cart recovery, and analytics to see Shopify’s full capabilities.
- Try the Mobile App: A lot of store management happens on the go. Download the Shopify mobile app to see how it fits your workflow.
- Test Customer Support: Submit a support ticket or use live chat to gauge response times and helpfulness. Good support is crucial for your business.
- Customize Your Theme: Spend time personalizing a theme to match your brand. This gives you a realistic preview of your potential store.
- Add Real Products: Don’t just use placeholder data. Add some of your actual products to see how they look and function in the store.
- Simulate the Customer Experience: Go through the entire buying process as a customer would. This helps identify any friction points.
- Evaluate App Integrations: If there are specific tools you need, check if they integrate well with Shopify during the trial.
Also Checkout:
Conclusions: How to Cancel Your Shopify Free Test In Just 7 Simple Stages (2025 Updated)
Shopify gives you a 3-day free test without the requirement of a credit card, allowing you to dive into the platform, set up your store, add products, add subjects, and install the app. However, keep in mind that you will not be able to sell or process payments until you choose a payment plan.
If you decide to cancel before the upgrade, you will not be charged any fee. Also, Shopify will maintain your store data for two years, so if you change your mind, then you have a lot of time to come back.
This free test is a great, risk-free opportunity to see if Shopify aligns with your ecommerce ambitions in 2025
FAQs
Officially, Shopify’s standard free trial is 3 days. After this, you are typically offered a promotional period of $1/month for the next 3 months, which acts as a low-cost extension to explore the platform.
Shopify doesn’t typically offer refunds for partial months if you cancel in the middle of a billing cycle. It’s best to cancel right before your next billing date.
Yes, but you’ll need to export your data before canceling. Most e-commerce platforms have tools to import data from Shopify, but the process may require some manual work.
If you bought a domain through Shopify, you’ll need to transfer it to another registrar before canceling to keep using it. Otherwise, it may become unavailable.
You can reactivate your store within 2 years of canceling by logging in and selecting a paid plan. After 2 years, your data is permanently deleted.